Action buttons in Salesforce provide a powerful way to automate tasks, streamline processes, and improve user experience. By creating a custom action button to launch a Flow, you can guide users through specific processes, such as updating contact information, sending a personalized email, or triggering automated tasks. In this blog post, we’ll walk you through the steps to create an action button on the Contact object that launches a Flow in Salesforce.
Create a Quick Action Button on the Contact Object
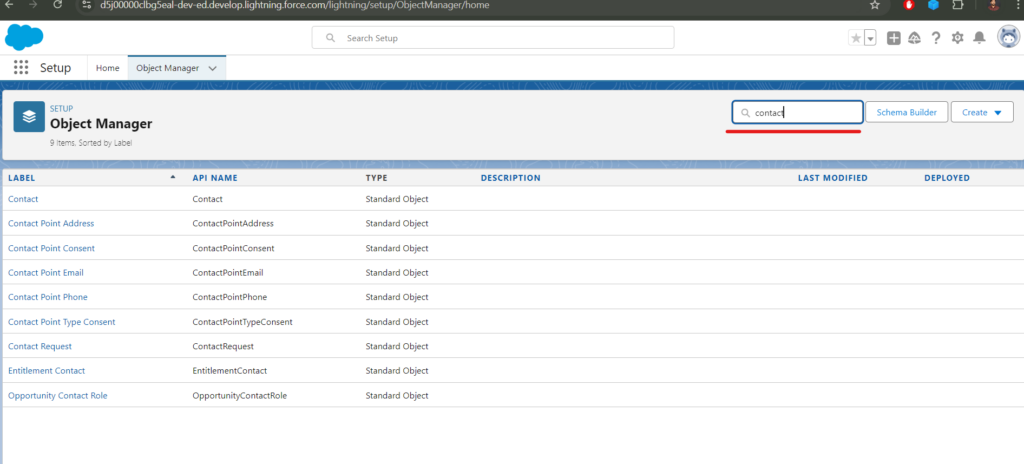
Go to Object Manager:
From Setup, go to Object Manager.
Search for and select Contact.
Create a New Action:
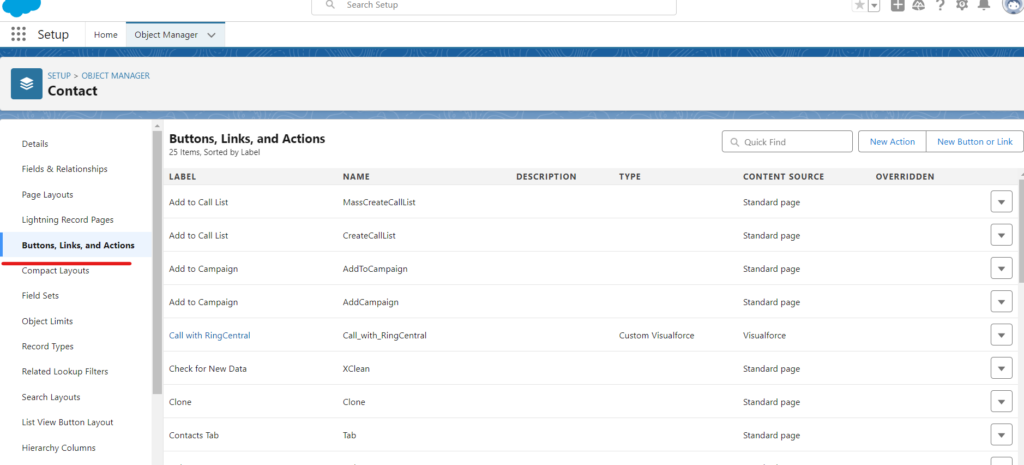
Click on Buttons, Links, and Actions.
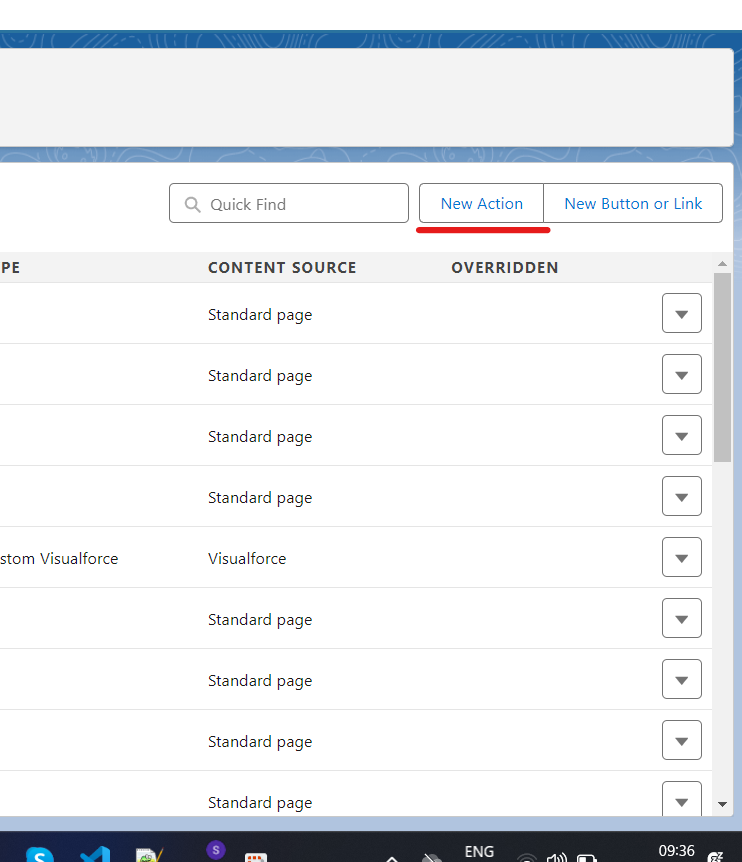
Click on the New Action button.
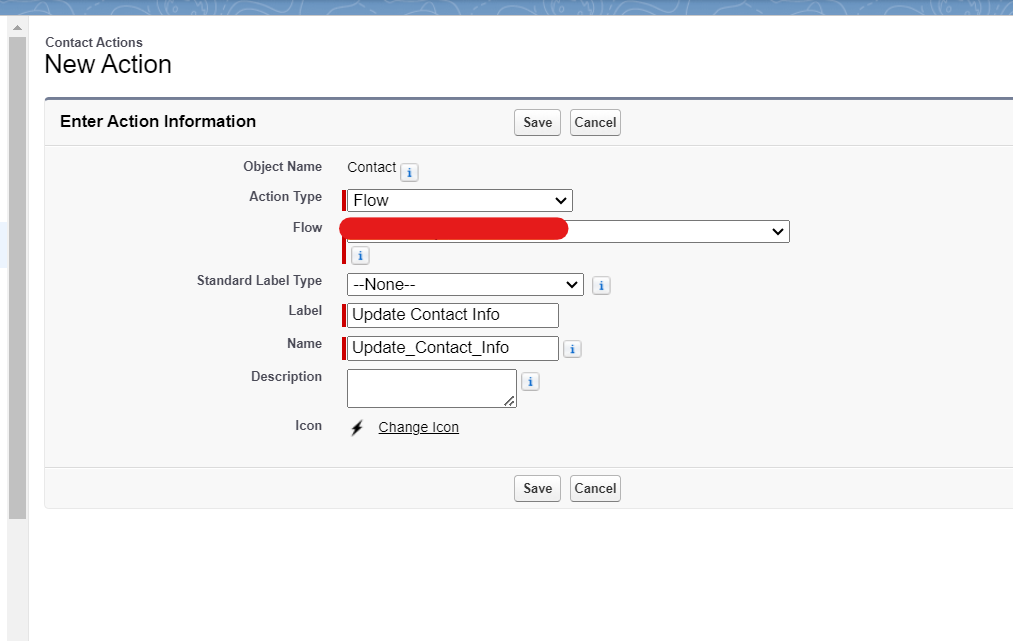
Configure the Action:
Action Type: Select Flow.
Flow: Choose the Flow
Label: Enter a label for the button (e.g., “Update Contact Info”).
Name: This will automatically populate based on the label.
Description (optional): Provide a description for the action.
Target Object: The Contact object should already be selected.
Add the Action to the Contact Page Layout
To make the action button visible, add it to the Contact object’s page layout.
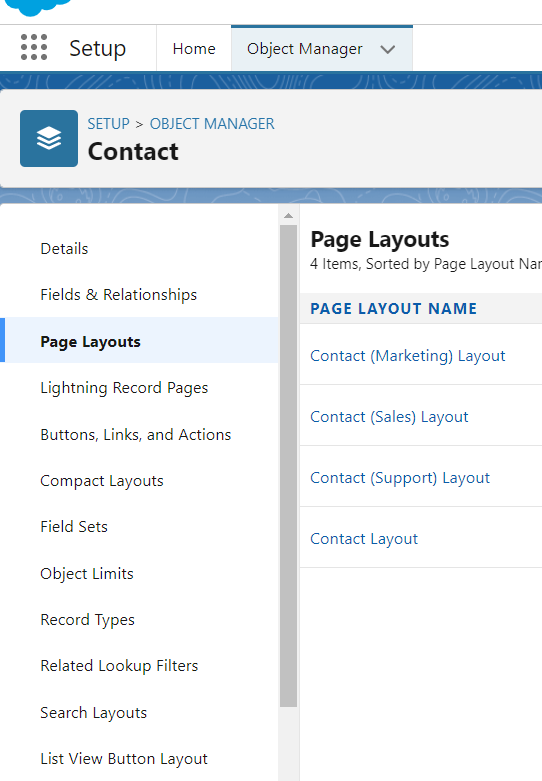
Navigate to the Page Layout:
Go to Object Manager → Contact → Page Layouts.
Select the Contact Layout (or the layout you are using).
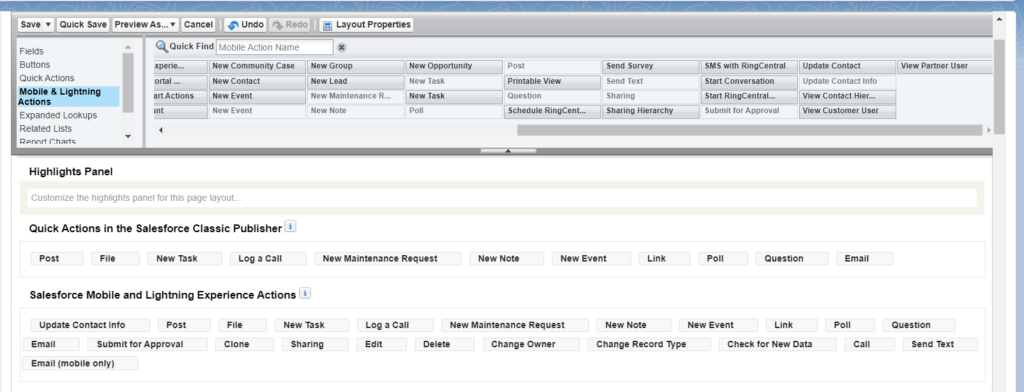
Add the Action Button:
Find the Salesforce Mobile and Lightning Experience Actions section in the page layout editor.
Drag your newly created action from the top panel to this section.
Save the Page Layout:
Click Save to update the layout.
Test the Action Button
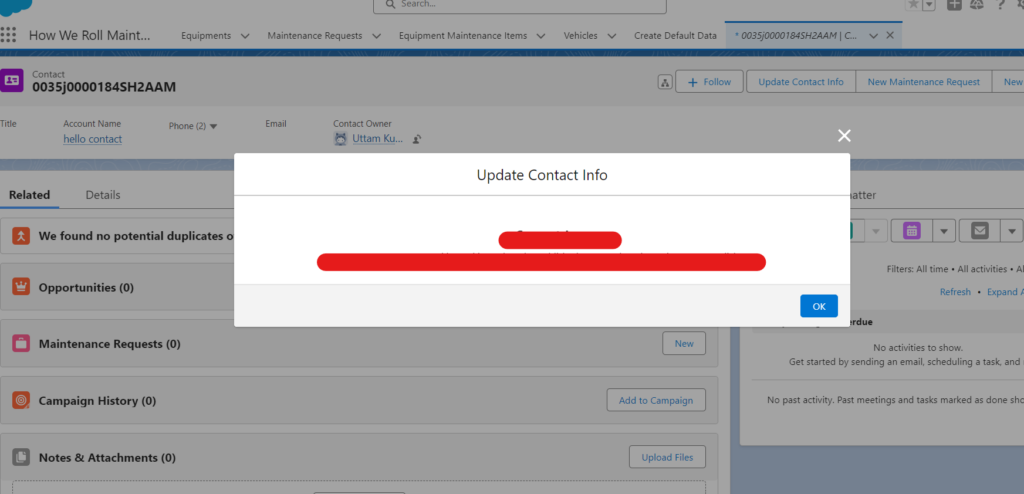
Open a Contact Record:
Go to the App Launcher and open Contacts.
Select any Contact record to view its details.
Click the Action Button:
Find your new action button (e.g., “Update Contact Info”) on the page.
Click the button to launch the Flow.
Verify the Flow Behavior:
Follow the Flow screens and logic to ensure it functions as expected.