Setup Vs code for Lightining web component (LWC)

Today In this article we will set up Vs code for LWC development.
Step 1: Download: Salesforce CLI
Step 2: Install sfdx CLI.
Note: You have must Install Java on your Computer.

Click : Next

Click : Install

Click Close.
Step 3:  Now open Vs Code and search “Salesforce Extension pack “.

Click: Install 
Step 4 : Press: CTRL+SHIFT+P, Search “SFDX:  create project with Manifest”

Step 5: Now Select Standard project template

Step 6: Now  Enter Project Name : HelloWorld

Click :  Click on Create Project

Step 7: now authorize your dev org
Step 8: Click on No default Org Set
Step 9: Click on production to log in to your developer org

Step 10: Expand your force app folder. Right-click on Lwc and  Click on create lightning  web component

helloWorld.html

				
					<template>
    <h1>Hello World</h1>
</template>


helloWorld.js

Leave it as it is.

helloWorld.js-meta.xml

				
					<?xml version="1.0" encoding="UTF-8"?>
<LightningComponentBundle xmlns="http://soap.sforce.com/2006/04/metadata">
    <apiVersion>52.0</apiVersion>
    <isExposed>true</isExposed>
    <targets>
        <target>lightning__AppPage</target>
        <target>lightning__RecordPage</target>
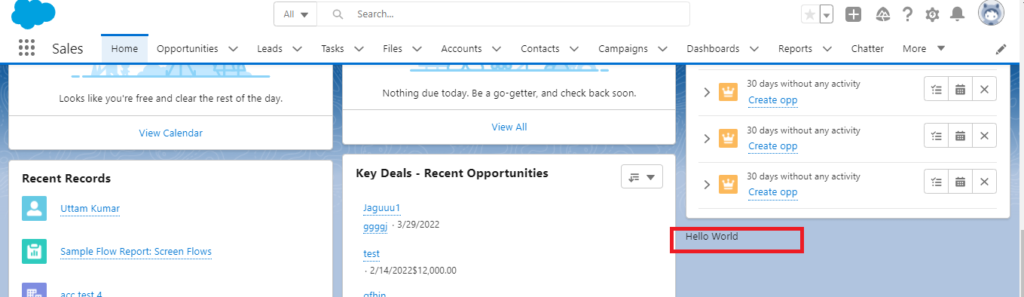
        <target>lightning__HomePage</target>
    </targets>
</LightningComponentBundle>


Step 11: now  Deployed your code to org

Output

Step 1: Go to the sales home page
Step 2: Click on the gear icon
Step 3: drag and drop your component into the home page

Now you can see below picture

Leave a Comment